How to Draw a Robot
For those interested in both art and mechanics, I’ve created three completely different but very simple methods that will show you how to draw a robot.

How to Draw a Robot: Introduction
Greetings, future artists! Today’s mission, should you choose to accept it, is learning how to sketch a simple,e and authentic robot.
Robots can be as varied as our imaginations, and this lesson I’ll tack you the fundamentals of robotic design, so you can illustrate any type of these machines with ease.
In this lesson, you’ll also discover that drawing a robot doesn’t require a degree in engineering. We use only very simple shapes to build the body and details.
As mentioned at the beginning, this robot drawing lesson includes several versions, each showing a completely different type of humanoid machine and a new way to depict it.
After completing the main lesson, keep scrolling down the page to reach the additional methods and further develop your drawing skills.
Robot Drawing Tutorial
Materials
- Pencil
- Paper
- Eraser
- Ruler (optional)
- Coloring supplies
Time needed: 30 minutes
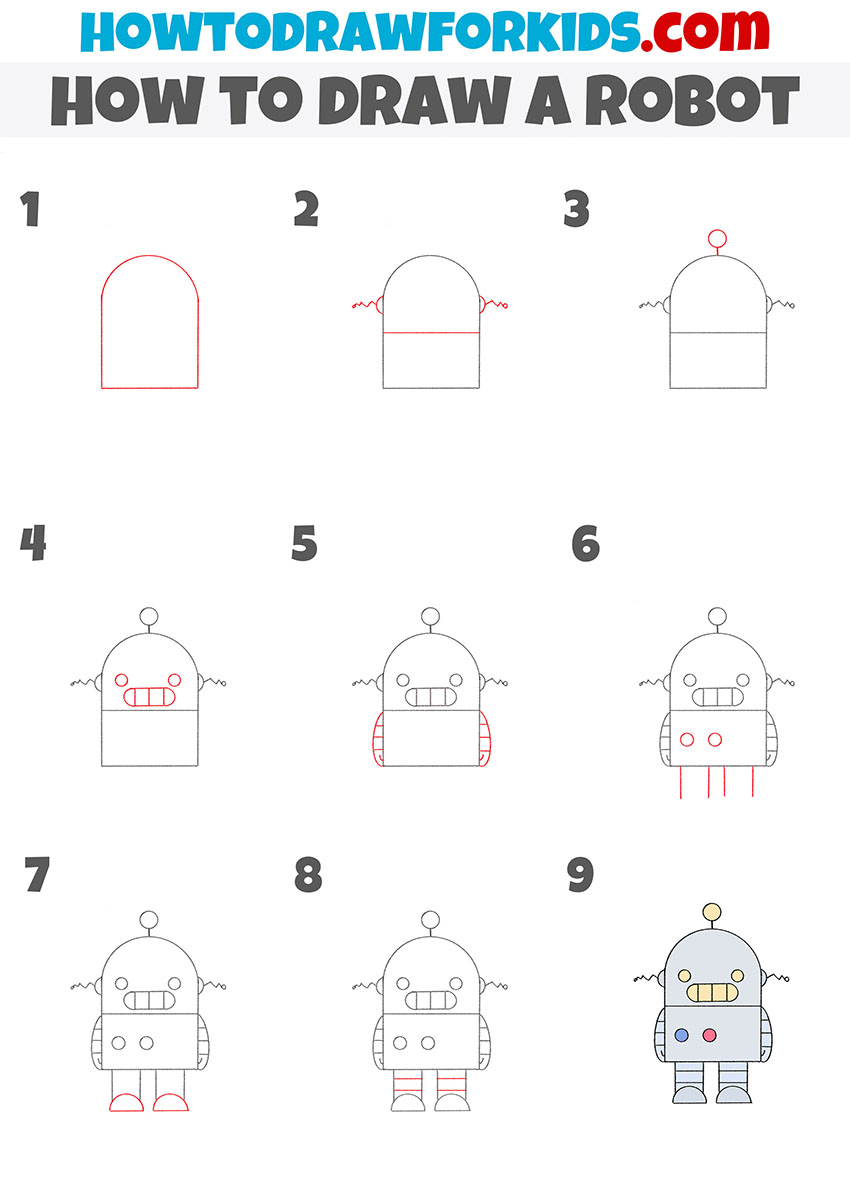
How to draw a robot step by step
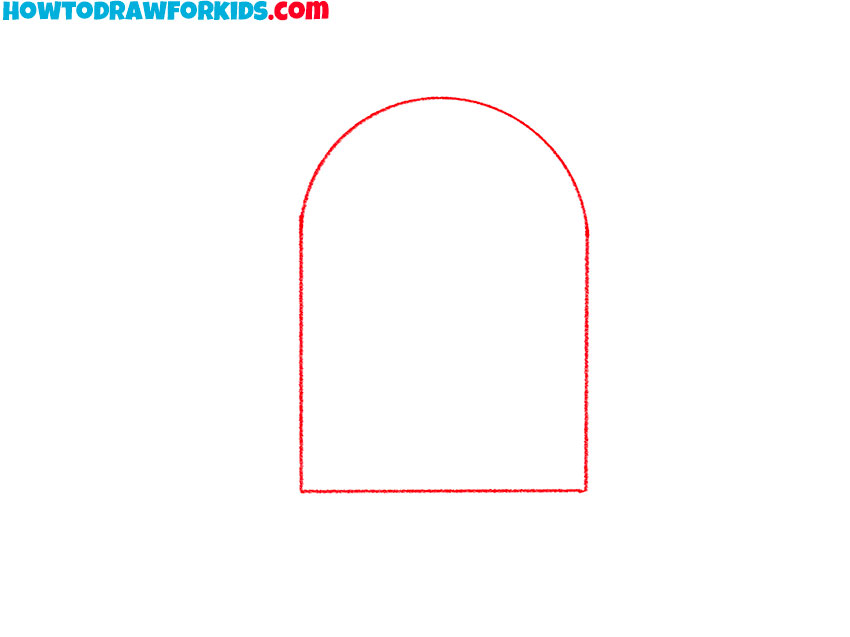
- Mark the mechanical body outline.
The body of the robot should look solid and symmetrical, so begin with a simple geometric base. Sketch a tall rectangle with rounded corners at the top, almost like a capsule standing upright. This will serve as both the robot’s head and torso. Try to keep your lines straight and even – using a ruler for the sides can help, but the top curve should be drawn freely.
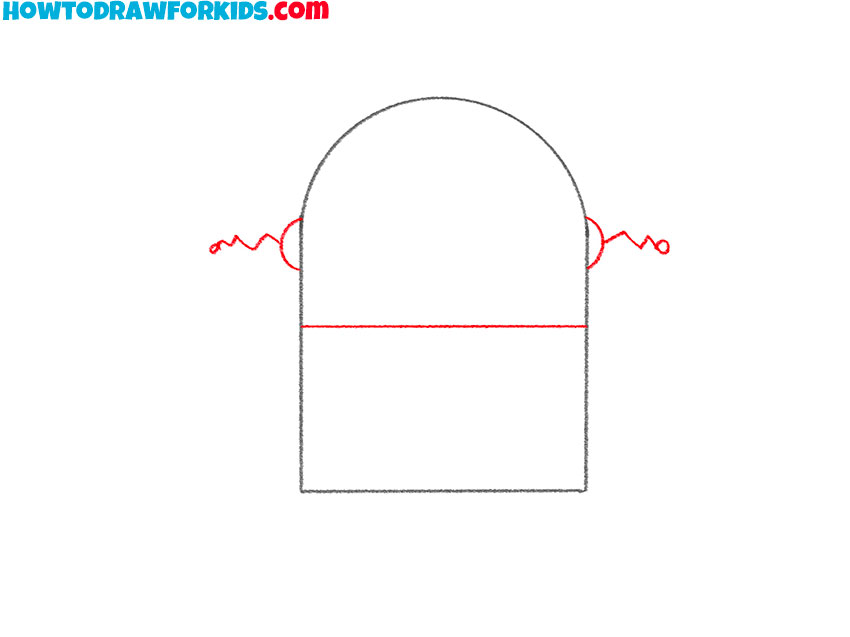
- Add the dividing line and ear antennas.
To divide the robot’s body, draw a straight horizontal line about one-third of the way down from the top. This separates the head from the torso. On each side of the upper section, add short wavy lines that will become the robot’s flexible wires. The waves should be even and symmetrical.
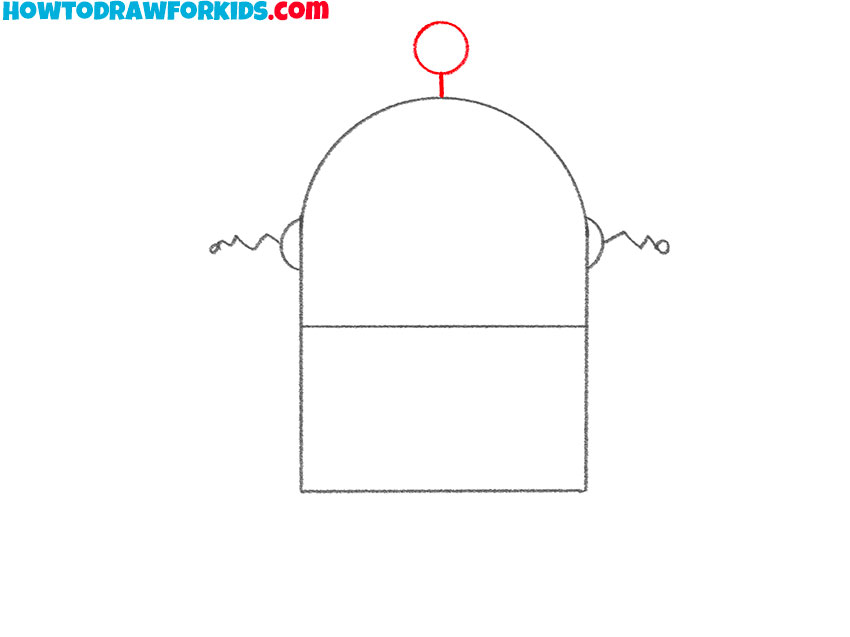
- Draw the robot antenna on top.
Every classic robot design looks more complete with an antenna, so add one to the top of the head. Sketch a thin, straight line coming up from the center of the curved top, and then draw a small circle at the end. You can make this part longer or shorter.
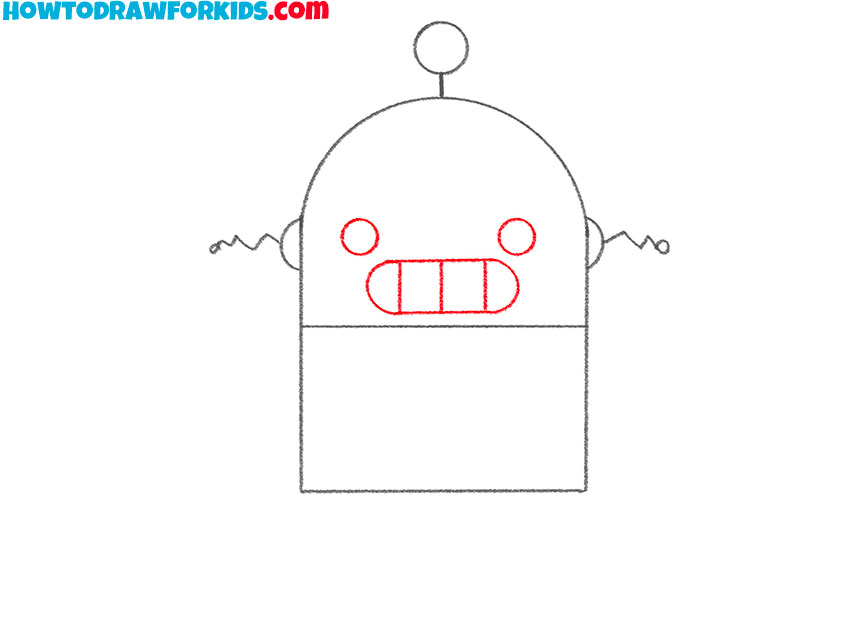
- Sketch the eyes and mouth grid.
Now, draw two small circles for the eyes, placing them just below the curved top. Between them, sketch a wide horizontal rectangle for the mouth, leaving space inside to add vertical lines that represent the robot’s teeth or speaker grid. You can make the eyes slightly higher or lower.
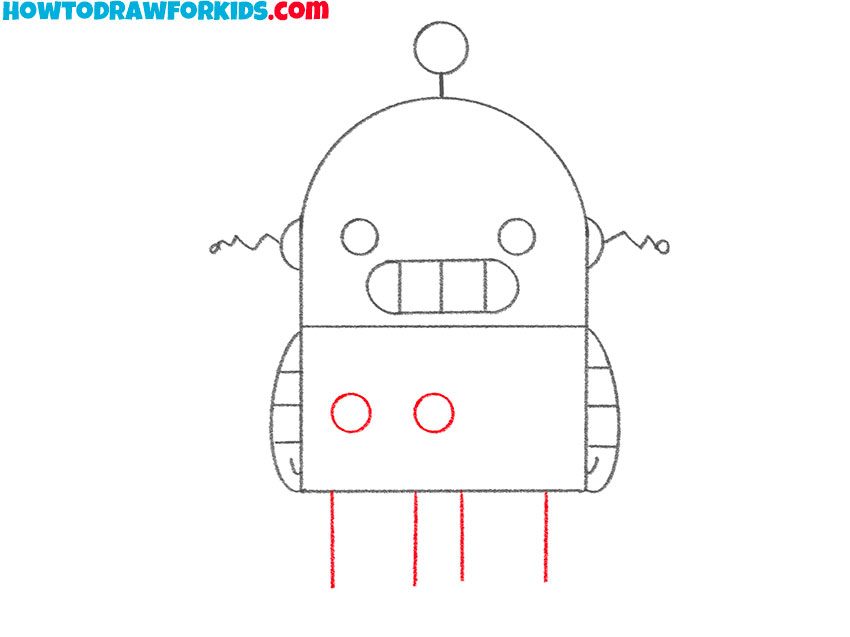
- Draw the robotic arms.
Now, sketch two large semicircles or smooth lines on each side of the body. These will serve as arm pieces. Inside each shape, draw two or three horizontal stripes to represent the flexible joints or metal plating of the arms. Make sure both sides mirror each other.

- Add the buttons and leg outlines.
Robots often have control panels or indicators on their bodies, so illustrate two small circles on the torso to serve as buttons or lights. You can place them vertically and centered, or change the position and shape of the buttons and lights. Below the torso, sketch two pairs of straight vertical lines to mark where the legs will go.
- Draw the feet of the robot.
Now, turn the basic shapes into solid legs, sketching two flat bumps at the end of the leg edges from the previous step. Try to make both legs equal in width and length to preserve symmetry.
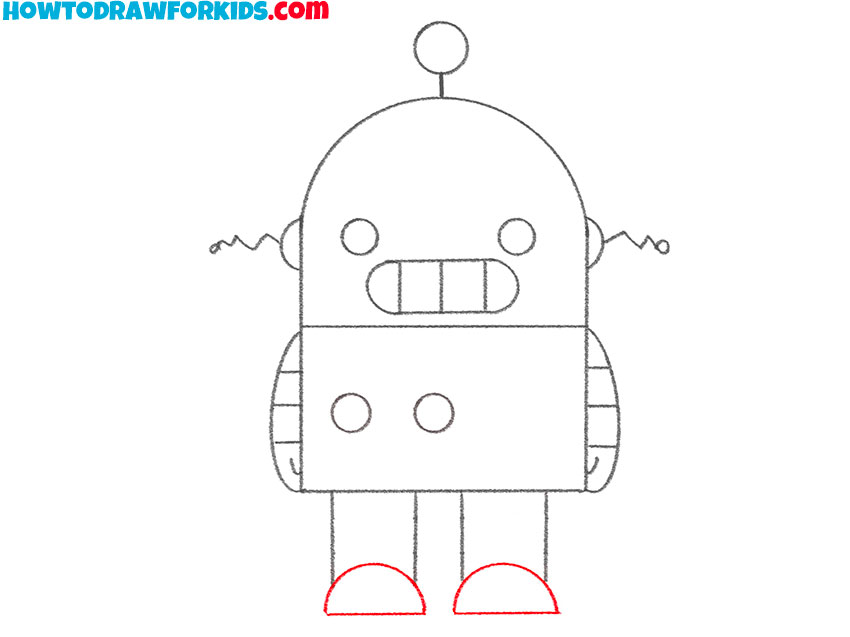
- Detail the legs of the mechanical character.
Add small details to make the robot drawing more complete. You can draw lines on the legs to represent metal plates or hinges. Then, darken the outlines of the entire figure, making them smooth and clear. This is also a good moment to check proportions.

- Color the robot illustration.
Use simple, clean colors that match the mechanical theme. Light gray or metallic silver works well for the body. You can use bright shades like red, blue, or yellow for the buttons and antenna. For the glowing areas, such as the eyes, mouth, and the top circle of the antenna, use a light, muted yellow.

Additional Content
I’ve prepared a free PDF version of this robot drawing lesson for convenient offline use. It includes the key steps and outlines from the tutorial, allowing you to practice drawing at any time.
The file is designed to be printer-friendly and easy to store on any device. Whether you are away from the internet or prefer working from paper, this version will help you continue improving your drawing skills.
How to Draw a Robot: Alternative Techniques
In addition to the main tutorial, I’ve included several alternative ways to sketch a robot. Each method introduces slightly different proportions and features, allowing you to practice varied shapes and mechanical details.
These variations will help you improve your understanding of construction and details.
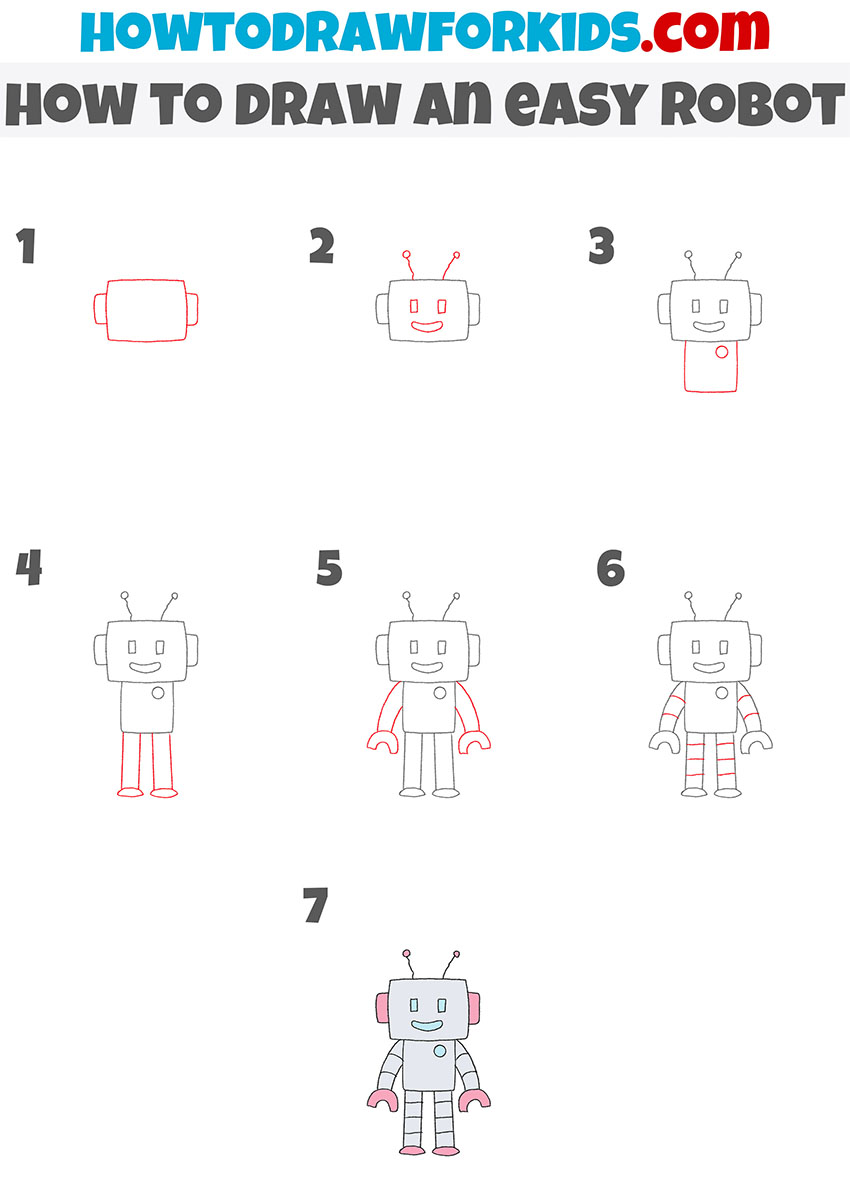
How to Draw a Robot Easily
This simplified method shows how to draw a robot using very simple and basic forms. In seven short steps, the process demonstrates how to outline the main parts of the robot’s body without adding unnecessary detail.
The approach helps beginners understand structure and basic details while keeping the whole sketching process easy to follow.
Detailed Robot Drawing Lesson
In this more developed method, the process expands on the basic forms shown in the earlier examples. Starting with a simple rectangle for the torso and a smaller one for the head, additional parts such as facial features, antennas, and joints are gradually introduced.
The method adds a moderate level of complexity, suitable for learners who want to include more details and precision in their work.
With eight very simple and clear steps, it balances simplicity with new challenges, helping to create a more defined and characteristic robot design.

Conclusion
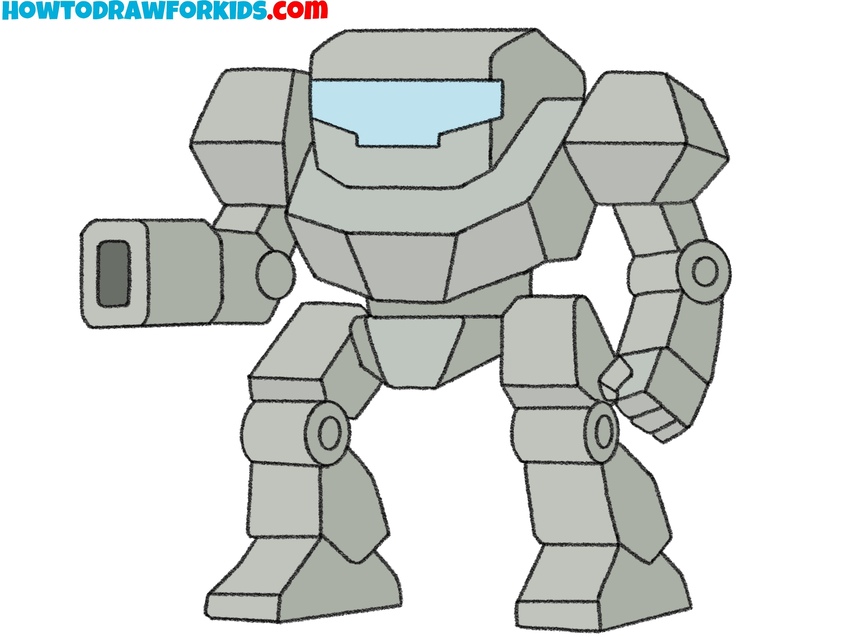
You’ve now finished the robot drawing tutorial and created your own simple mechanical design. If you’d like to continue practicing, check out other related lessons on my site – for example, a mech drawing tutorial or guides on drawing vehicles and machines.
Keep improving your skills and stay updated by following my social media. Every new lesson builds on what you’ve learned, helping you develop your sketching skills.