How to Draw a Bus
In this how to draw a bus tutorial, I’ll guide you through breaking down the complex structure of a bus into easy steps. This method focuses on simplifying each element of the bus’s design, ensuring the drawing process is both accessible and enjoyable, allowing you to efficiently master the skills needed to create an accurate representation.


How to Draw a Bus: Basic Information
I’ve designed this tutorial with the intention of teaching you how to draw a bus using a methodical approach that simplifies complex structures into manageable geometric shapes. Starting with a basic rectangle, we will progressively add details like windows, doors, and wheels, enabling a gradual build-up from simple to complex.
This approach emphasizes precision in drawing geometric forms and understanding how different shapes interact to create the bus’s overall appearance. By focusing on the accurate alignment and proportion of each element, from windows to doors, the goal is to achieve a realistic representation of a city bus.
Completing the drawing involves refining the initial sketches, enhancing details, and adding final touches that define the bus’s character, like mirrors and headlights. The tutorial encourages using minimal yet effective strokes to capture the bus’s key features, resulting in a polished and recognizable depiction when you draw a city bus.
Bus Drawing Tutorial
Materials
- Pencil
- Paper
- Eraser
- Coloring supplies
Time needed: 40 minutes
How to Draw a Bus
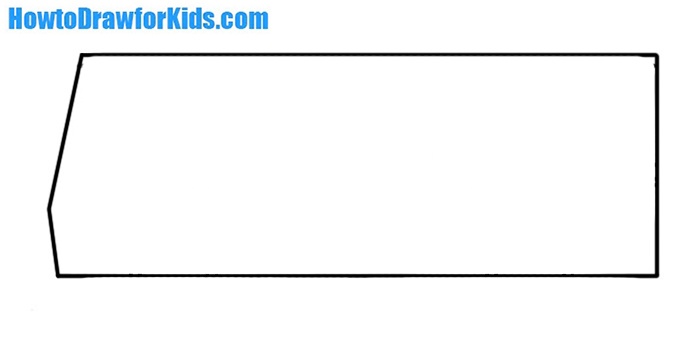
- Form the body of the bus.
Begin by visualizing the length of the bus. Draw a long, horizontal rectangle that spans most of your drawing area; this will form the body of the bus. On the left end of the rectangle, add a truncated shape, like a trapezoid without the bottom base, which will serve as the front of the bus.
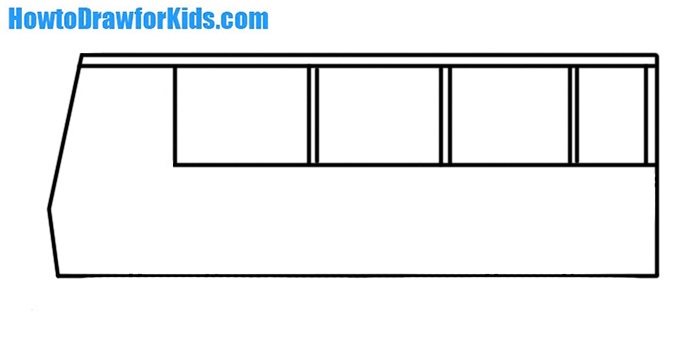
- Draw the windows of the bus.
Within the confines of the long rectangle, sketch five evenly spaced vertical lines starting from the trapezoidal front. These lines will be the framework for the windows on the side of the bus. Ensure they are proportionate to the height of the rectangle.
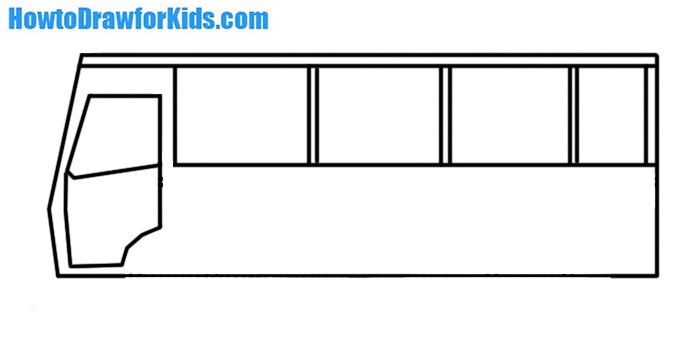
- Draw the door of the bus.
Crete the bus door behind the front wheel area, adding two parallel lines for its edges and a line for the top. Ensure the door is proportional to the bus, suggesting it can slide or swing open. You can include a handle to highlight the door’s functionality.
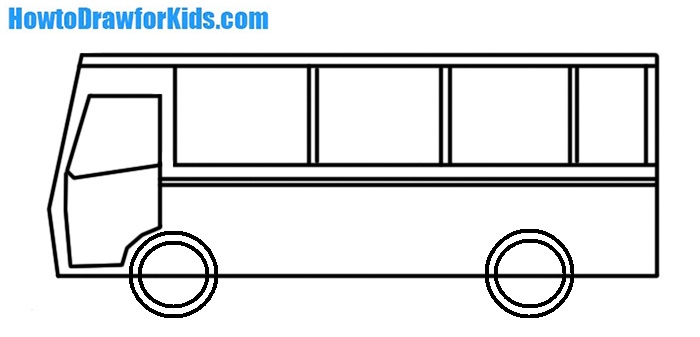
- Draw the wheels.
Just below the body of the bus, draw two large circles for the wheels. They should be in proportion to the bus body, substantial enough to support its size. Add lines at the side of the body. The lines should be parallel and clean to maintain a sense of order and neatness in the structure of the bus.
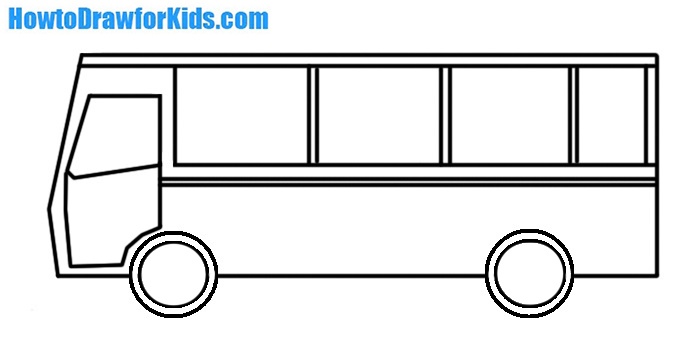
- Refine your bus drawing.
Trace over your initial pencil lines with a darker stroke to solidify the outline of the bus. This step is about refining and defining, so carefully go over each part, ensuring that the lines are smooth and that any unnecessary guidelines are erased or cleaned up.
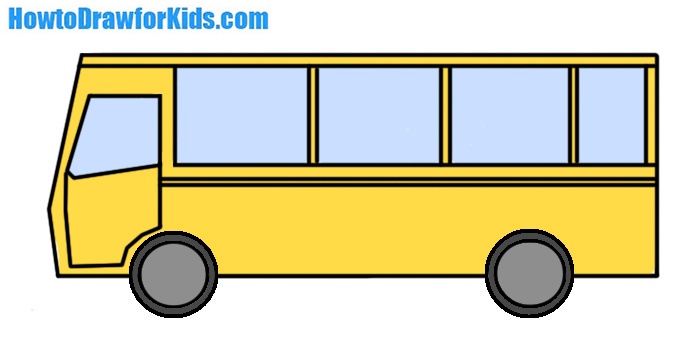
- Add colours to the bus artwork.
Choose a vibrant yellow, the classic color for a school bus, and fill in the body, avoiding the windows, wheels, and headlights. Next, add a medium gray shade to the wheels to create the rubber tires. For the windows, use a light blue to give an impression of glass reflecting the sky.


Additional Content
To complement the bus drawing tutorial, I have also compiled a free PDF file. This compact version is tailored for on-the-go practice, allowing you to hone your skills without the need for internet access. It’s the perfect supplement for those moments of sudden inspiration or quiet contemplation away from the screen.
Beyond the foundational stages, this PDF provides additional materials aimed at elevating your drawing prowess. It’s an after-class treasure, meant to be used once you’ve grasped the basics from the main lesson, filled with exercises and insights to refine your technique.
This downloadable resource is a bridge to further your artistic path, ensuring the path of learning is ever-extended. As you transition from drawing a simple bus to mastering more complex scenes, the PDF serves as a helpful guide, encouraging you to practice diligently and improve in your creative pursuits.
Alternative Drawing Method
To ensure a well-rounded learning experience, I’ve devised an alternative technique for drawing a bus, tailored for ease and accessibility. This fresh approach simplifies the process, stripping down complexities to encourage practice and bolster your artistic confidence. It’s designed for those who find comfort in clarity and progress in incremental steps.
This new method is a gentle slope in the learning landscape, ideal for budding artists seeking to solidify their foundational skills. It focuses on the essentials, offering a serene path to improvement that complements the detailed intricacies of the original tutorial. With each line drawn, the joy of artistic growth becomes more tangible.
By presenting this simpler alternative, I aim to diversify your practice routine, fostering an environment where continual improvement is encouraged and inevitable.
How to Draw a Bus for Kindergarten
For our youngest creators in kindergarten, this simple alternative method of drawing a bus transforms a complex vehicle into a series of joyous shapes. Beginning with a large rectangle and a rounded front, it’s a celebration of the bold and free-spirited lines that children naturally draw, perfect for their developing motor skills and confidence in art.
The method progresses as children add squares and rectangles for windows and doors, turning shape recognition into an interactive game. It’s a whimsical approach that entwines learning with play, allowing little ones to explore basic geometric forms while bringing their artwork to life, piece by piece.
In the final flourish, the bus’s wheels are added – circles that signify both the conclusion of the drawing and the beginning of imaginary travels. This technique, tailored for tiny hands, focuses on the final picture and providing a space for children to express themselves and make their mark in the world of art.

Key Mistakes to Sidestep in Bus Drawing for Beginners
Even in simplicity, there are pitfalls that await the unwary illustrator. Let us illuminate these common missteps so that we may steer clear and keep our artistic vehicles on the right track.
- Not maintaining straight lines for the bus body, leading to a wobbly structure.
- Windows of varying sizes can create a sense of disproportion.
- Overlooking the symmetry of the bus’s wheels, which may result in an unbalanced look.
- Applying uneven pressure while coloring, causing the final product to lack uniformity.
- Misplacing the horizon line, which can throw off the perspective.
- Neglecting to use light strokes initially, making corrections more challenging.
With each drawing, the aim is to replicate a form and imbue your canvas with the illusion of depth, movement, and life. Let your bus not merely exist on paper but travel the avenues of your burgeoning creativity, leaving behind the scuffs of early attempts, evolving into a refined piece of art with each new stroke.
Addressing Your Top Bus Drawing Inquiries
In the tranquil aftermath of our bus drawing session, a myriad of questions may yet linger, like soft shadows at dusk. Here, within this sanctuary of curiosity, we address the whispers of inquisition with a collection of FAQs, meticulously gathered to dispel any vestige of doubt that may cloud your artistic horizon.
- How can we ensure the bus is symmetrical? One might employ a simple ruler to measure and compare distances, ensuring both sides mirror each other in harmony.
- Why are the wheels not perfectly round? The charm of art made by children lies in its imperfection, which we celebrate rather than correct. Over time, practice naturally leads to improved shapes.
- Can this lesson be adapted for other vehicles? Indeed, the foundational shapes and principles apply broadly and can be creatively adapted to draw various types of vehicles.
- How can we add more detail to our bus drawing? Details such as shading, people inside the bus, or even a backdrop can be introduced gradually as one’s confidence and skill expand.
- How long should a child spend on each step? Time is less of a teacher than observation and feeling; hence, each step should last as long as needed to feel complete and understood by the young artist.
As the curtains fall on this artistic act, let these FAQs serve not as mere answers but as lanterns in the ever-growing night of learning. May they guide your path long after the echoes of this lesson fade, for the quest for knowledge is a road without end, and every question you ask paves it further still.
Conclusion
After our session on drawing buses, consider exploring more topics. My website features lessons on a range of subjects, from butterfly wings to human nose. Each tutorial is designed to help you develop new skills and techniques, ready for you to start whenever you are eager to learn more.
I invite you to join our community of creators by subscribing to my social networks, where the pulse of new content beats strong. Your thoughts and suggestions are the lifeblood of our creative future, so I welcome your comments beneath the lesson.


Thank you for this tutorial! Thank you!
draw it
Really awesome!!
Thank you so much, Anna.