How to Draw a Man
Learn how to draw a man in this basic tutorial. Step-by-step guidance covers essential techniques for creating a human figure, from head to toe, for kids and beginners.


In this step-by-step drawing tutorial I will show you how to draw a man. This guide is designed to help both kids and beginning artists learn the basics of figure drawing in a clear and approachable manner. Through simple instructions, you’ll progress from sketching the head outline to adding facial features, detailing the body, and completing the limbs.
This man drawing tutorial covers essential skills such as proportion, balance, and symmetry, helping you create a lifelike character. These foundational skills are crucial for beginners, offering a structured approach to drawing a human figure.
So, let’s start and learn how to draw a man!
Time needed: 50 minutes
How to Draw a Man
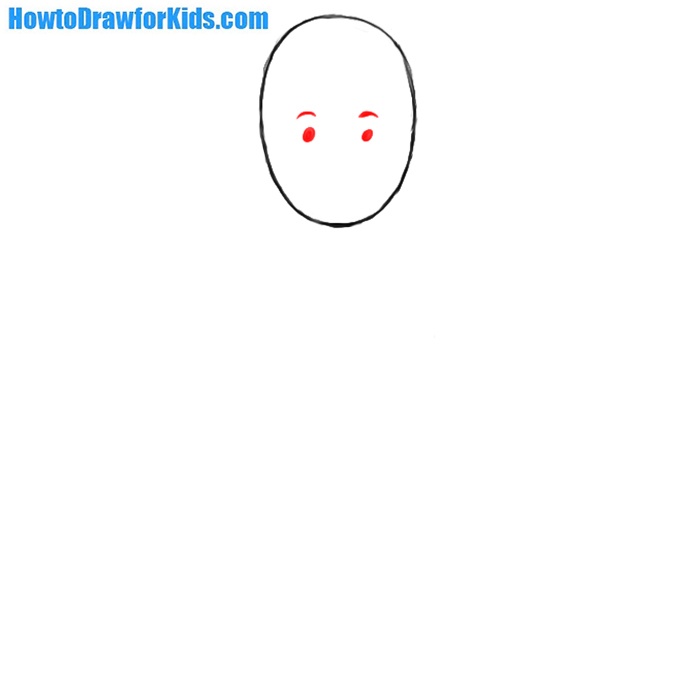
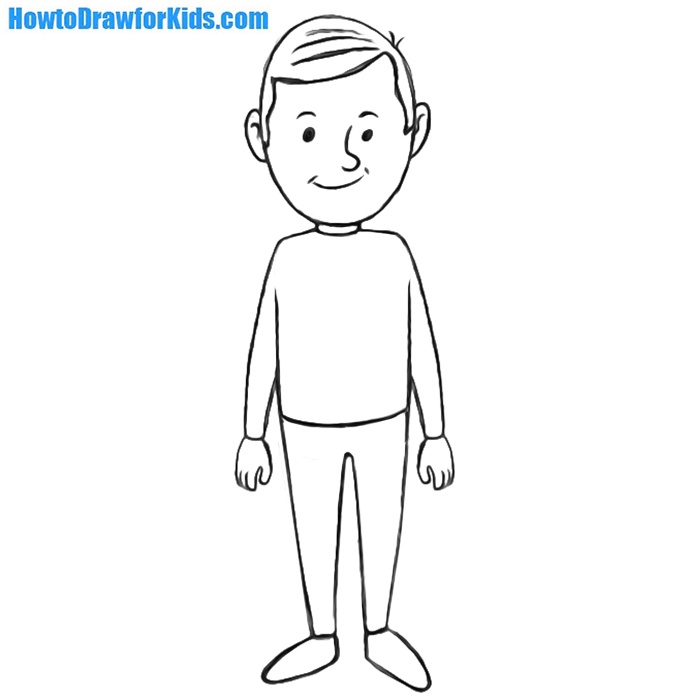
- Draw the head of the man.
Start by sketching an elongated oval shape for the head. Position it centrally on the paper, leaving enough space below for the body and limbs. This oval will act as the foundation for the face. This step sets the stage for all the facial features and provides balance to the entire drawing

- Add the eyes and eyebrows.
Within the oval, position two small dots to represent the eyes. Ensure they are evenly spaced and centered on the face. Above each eye, draw small curves to form the eyebrows, tilting them slightly to give the character an expressive look.
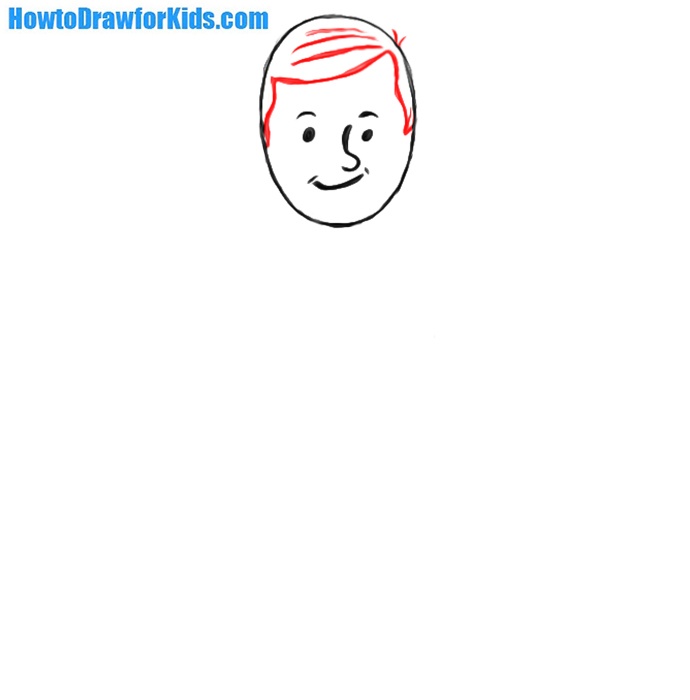
- Draw the nose and mouth.
Below the eyes, add a small, curved line to represent the nose, aligning it with the center of the face. Ensure its length is proportional to the distance between the eyes and mouth. Below the nose, draw an upward curve to represent a smile, keeping it centered between the nose and chin.

- Illustrate the hairstyle.
Draw the hairline around the top and sides of the head. Ensure the hairline follows a natural curve, reflecting the character’s head shape. Next, add short, wavy lines within this outline to give texture and depth to the hairstyle.
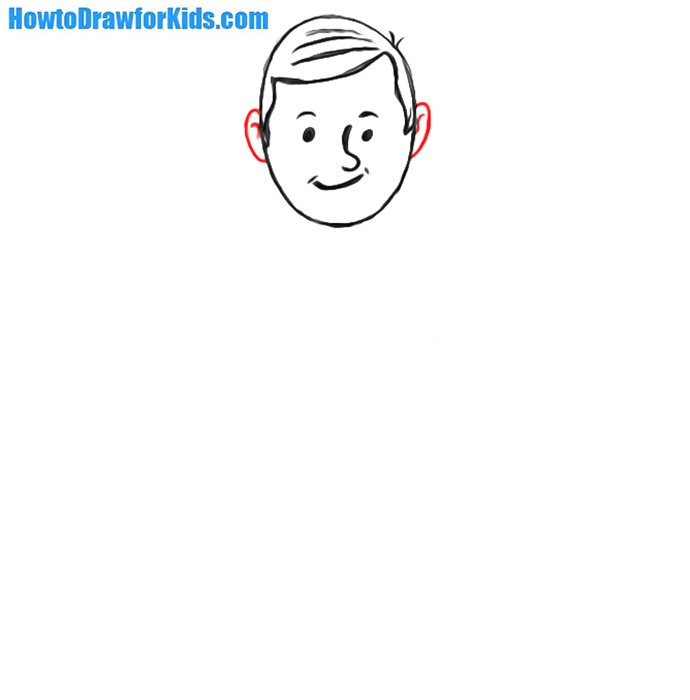
- Add the ears.
Position small curves on both sides of the head, aligning them with the eyes. These curves represent the ears, ensuring they are proportionate and symmetrical. Connect them to the head outline, completing the facial structure. The ears help frame the face and enhance its realism.
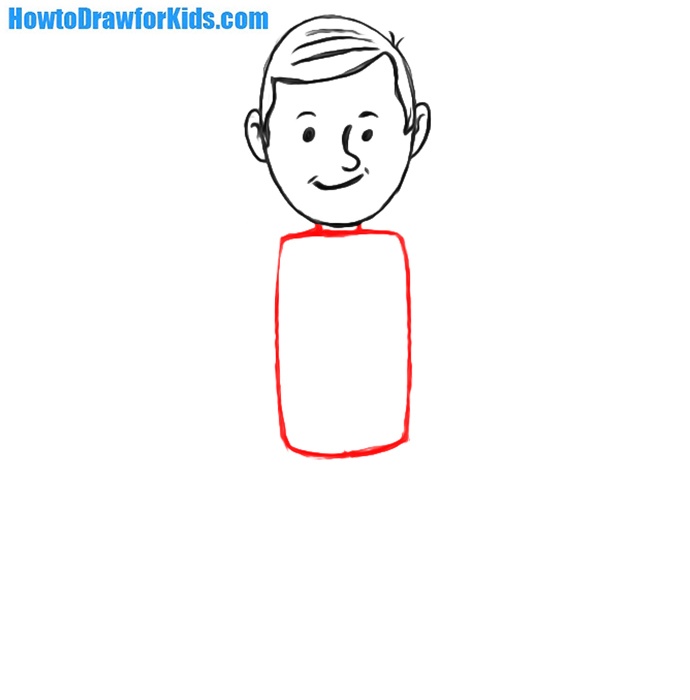
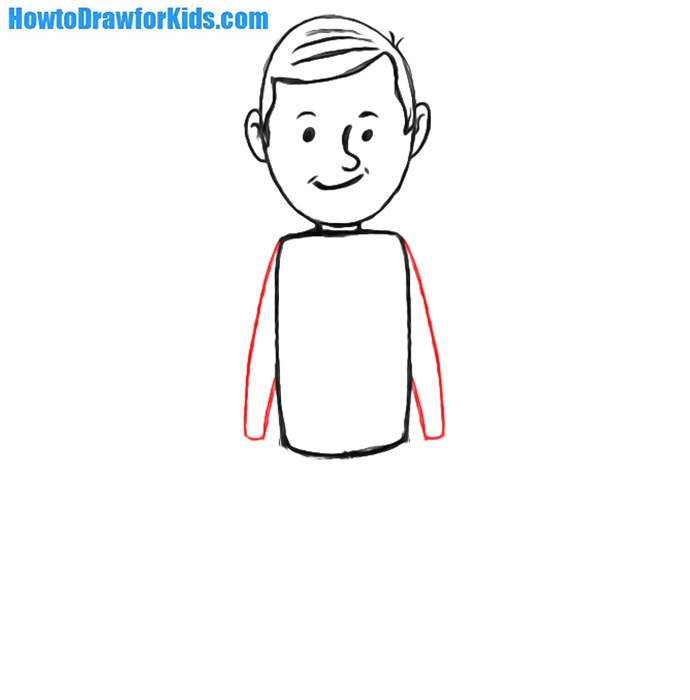
- Draw the torso and neck.
Draw a short line downward from the bottom of the oval to form the neck, ensuring it aligns with the center of the head. Below this, draw a rectangular shape for the torso, making its width slightly broader than the head. The rectangle should extend downward, leaving room for the legs.
- Illustrate the arms of the man.
From each side of the torso rectangle, begin drawing the arms. Start slightly below the top of the rectangle, extending a straight line diagonally downward for each arm, ending just below the waistline. Make sure these lines are of equal length and at a consistent angle to maintain symmetry.
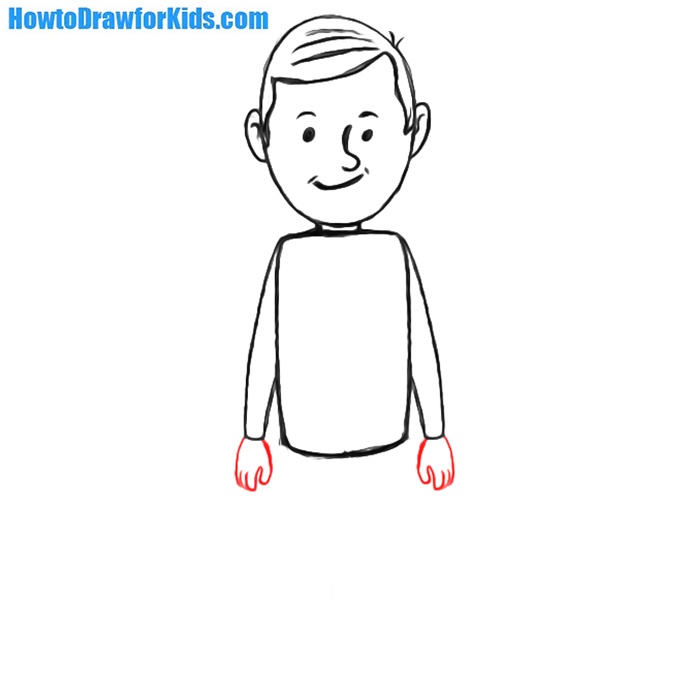
- Add the hands.
Start by drawing a small, rounded shape, resembling an oval or mitten, to represent the palm of each hand. Next, add fingers to each hand by sketching four small lines extending outward from each palm. To complete the hands, add a thumb on the inner side of each palm.
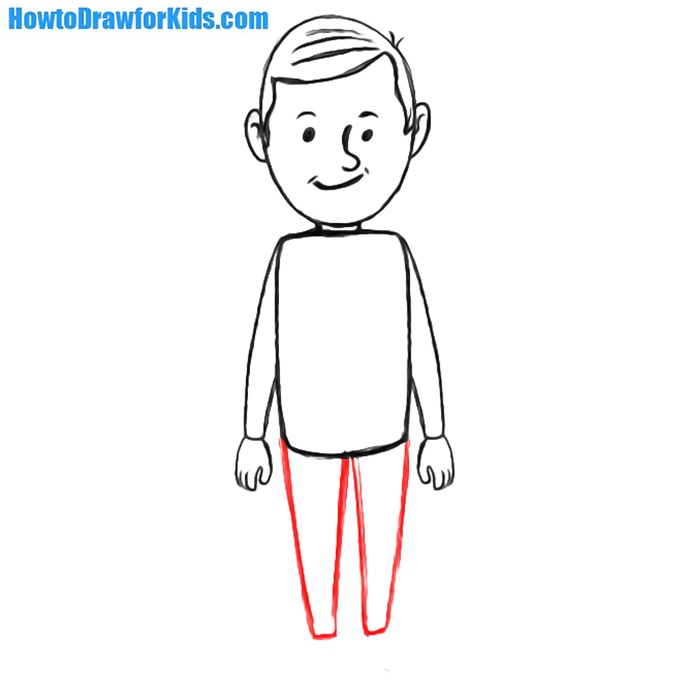
- Draw the legs.
Extend two straight lines downward from the bottom corners of the torso rectangle to form the legs. Next, draw two more lines that start at the bottom center of the rectangle and diverge slightly to the sides to complete drawing the legs.
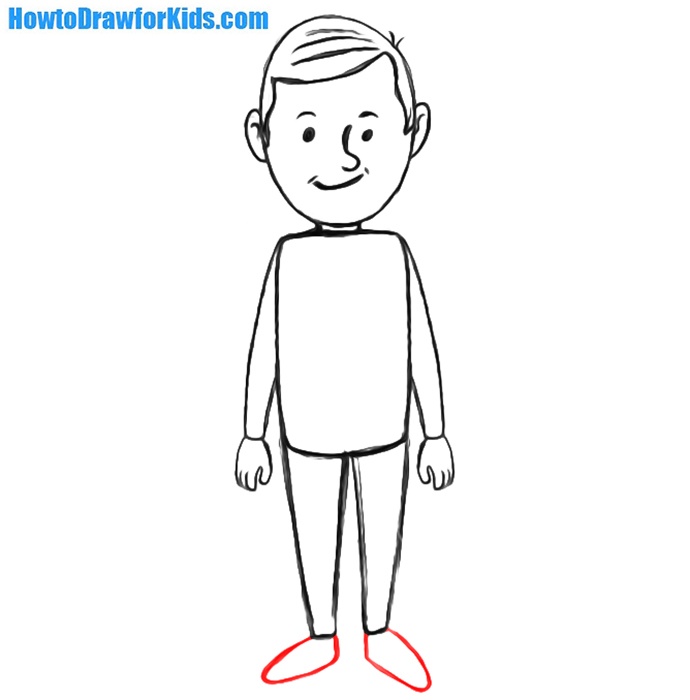
- Add the feet.
At the ends of the legs, draw two elongated shapes to represent the feet. These should be proportional to the legs, extending outward to form a stable base for the character. You can add minor details to indicate footwear, such as shoe lines or creases.
- Refine the man drawing.
Now, refine the entire figure, starting from the head down to the feet, removing any guidelines or rough sketches. Begin by smoothing the lines on the face, then move to the torso, arms and legs of the man. To complete this step, you can add minor details such as clothing creases or pockets.
- Color the drawing.
Now that the drawing is complete, it’s time to add color to bring it to life. Start by choosing a natural skin tone for the face, hands, and neck. Carefully fill in these areas, making sure to stay within the lines and maintain a uniform color.
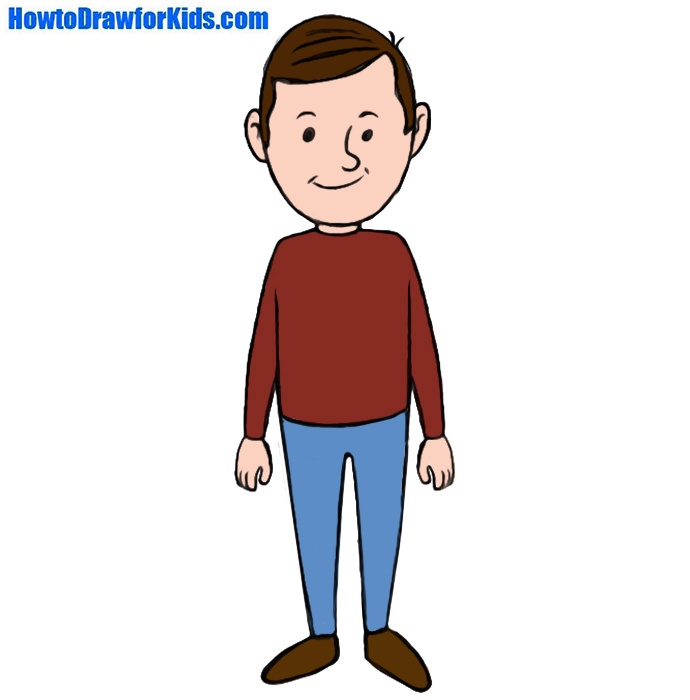


The instruction on how to draw a man step-by-step is now complete. Through this tutorial, you’ve learned to create a lifelike character by gradually building each feature, from the head to the feet. You refined the drawing by removing guidelines and adding subtle details, and then completed it with color, bringing the character to life.
Now that the drawing is finished, feel free to share this guide with others who might enjoy it. And don’t forget to subscribe to me on social networks like Pinterest and other platforms for more drawing tutorials.


Hey very nice!
Thanks
Dear how to draw for kids you are the most amazing drawers ever and just you’re amazing and we love you
Thank you love you bye Oh yeah subscribe to PewDiePie
Yes! I’ve learned how to draw a man!
REEEEEEEEEEe
VeRy GOoD dRaWInG
oO
—
Ha iN ThE tImE U SpEnT rEaDiNg ThIs I GaVe U A ViRuS!
LOOOL NOOOOOOOOOOOOOOOOOOOOOOOOOOOOOOOOOOOOOOOOOOOOOOOOOOOb
Ohh nooo! Please take this virus back, I don’t need it!
😉
I love your drawings soooooo much!!!
Thank you, Ben! I am very pleased to read such comments.
cool meh bruhhhhhhhhhhhhhhhhhhhhhhhhhhhhhhhhhhhh i have to eat cereal
It was perfect for my brothers birthday
Thank you, Amelia. I’m glad that my drawing tutorial was useful.
wow bow tow get the out of here
wow that is great but don’t look real!!! D:
It was meant for kids, it’s not meant to look real.
This lesson is specially stylized so that kids can draw a person without any problems.
its ok but i rate this 5/10
I would like to know what is the reason for such a low rating.
Really cool!
Thank you so much!
no help
My rate is 1 out of 10000000000
epic
Thanks!
i wub it 😀
soooooo epic epily epic
Thank you so much!
soooooooooo epic
Thank you so much!
it helped 6/10
Why not 10/10?
Why not 10/10?