How to Draw a Face


In this super simple basic drawing instruction, I’ll show you how to draw a face for kids.
Every artist needs to know how to draw a person and his body parts. One of the most difficult parts of the human body is the face.
Since Howtodrawforkids.com is intended for children and novice artists, this instruction on how to draw a face will be as simple as possible.
Below I will show you how to depict the face and all parts of the face in a simplified way and using the simplest way of describing.
Time needed: 1 hour and 20 minutes
How to draw a face
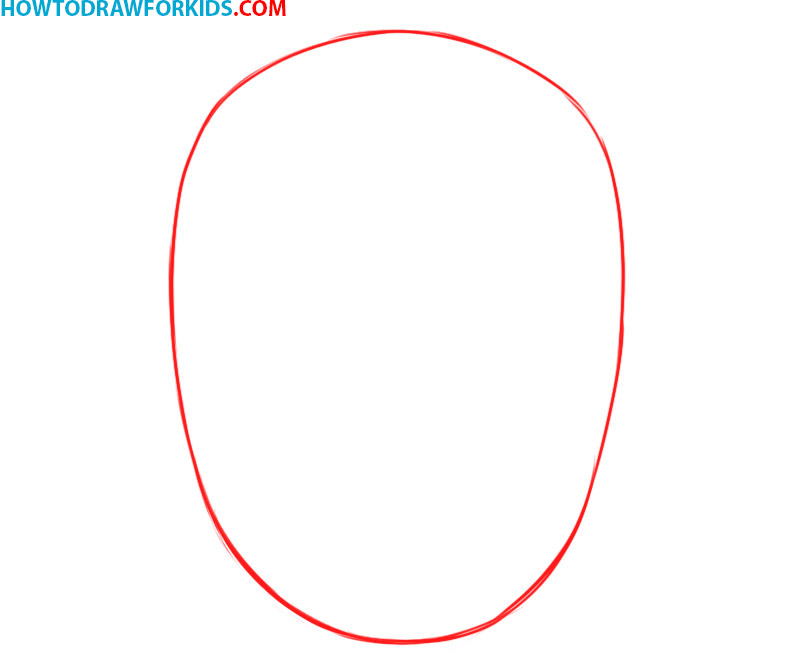
- Outline the face.
Start by creating an oval shape that tapers slightly towards the bottom, giving a natural shape that resembles a human face. This step sets the foundation for the rest of the drawing, providing a guide for placing the facial features. It’s essential to keep this outline light and fluid to allow for adjustments later on.
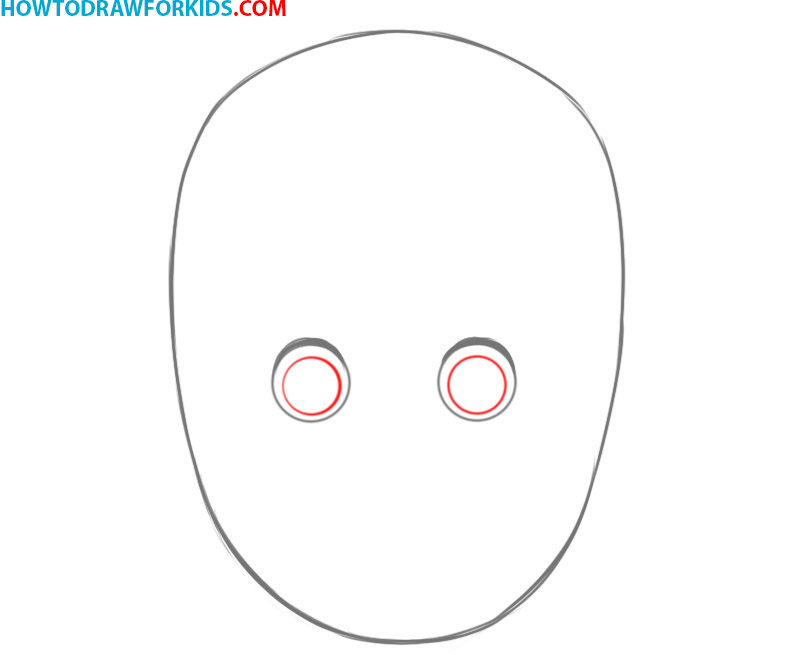
- Add the eyes.
Next, the eyes are added to the face. Draw two circular shapes positioned symmetrically in the upper half of the face, serving as the basic structure for the eyes. The placement of the eyes helps to divide the face into different sections, making it easier to add additional features later.

- Draw the pupils.
Inside each circular shape drawn earlier, add another smaller circle to represent the pupils. This gives the eyes a more complete look and adds to the expressiveness of the face. Ensure they are centered within the eye circles to create a natural and engaging expression
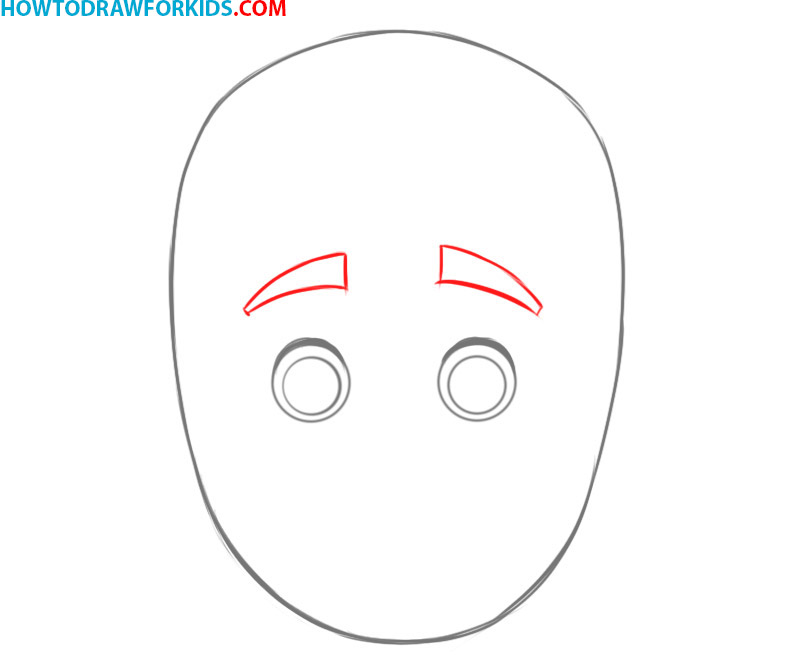
- Draw the eyebrows
The fourth step introduces eyebrows, which are drawn above each eye. Create a simple arch or curve above each eye circle, matching the shape of the eyes below. Careful placement of the eyebrows helps to create a balanced look and convey emotions such as surprise or neutrality.
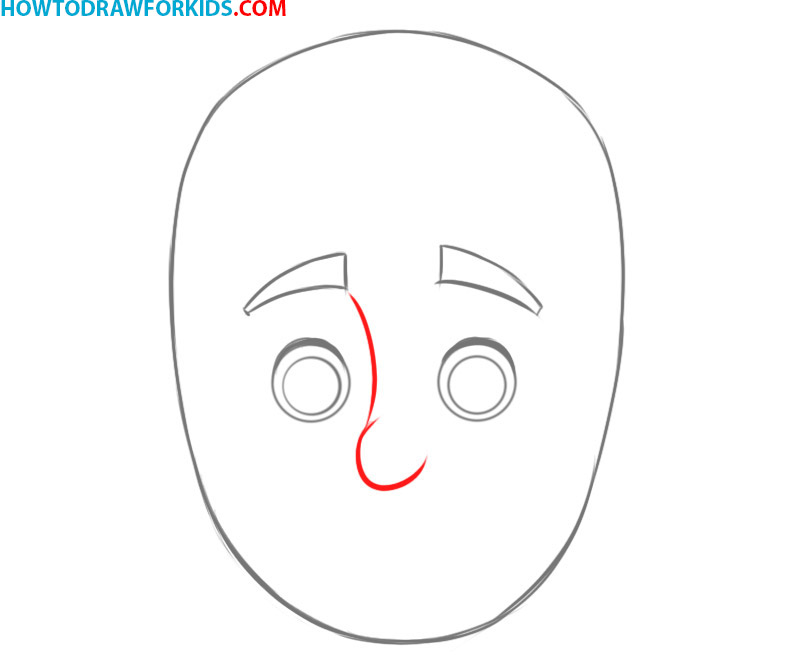
- Add the Nose
In this step, a nose is drawn at the center of the face. Begin by creating a simple line down the middle, connecting the space between the eyes and the area just above the mouth. This simple line serves as the foundation for the nose structure.
- Draw the Mouth
The sixth step adds a simple curved line to represent the mouth. Place this line in the lower third of the face, below the nose. This curve contributes to the overall expression of the face, with an upward curve indicating a smile.
The shape of the mouth adds character to the drawing, making it more engaging.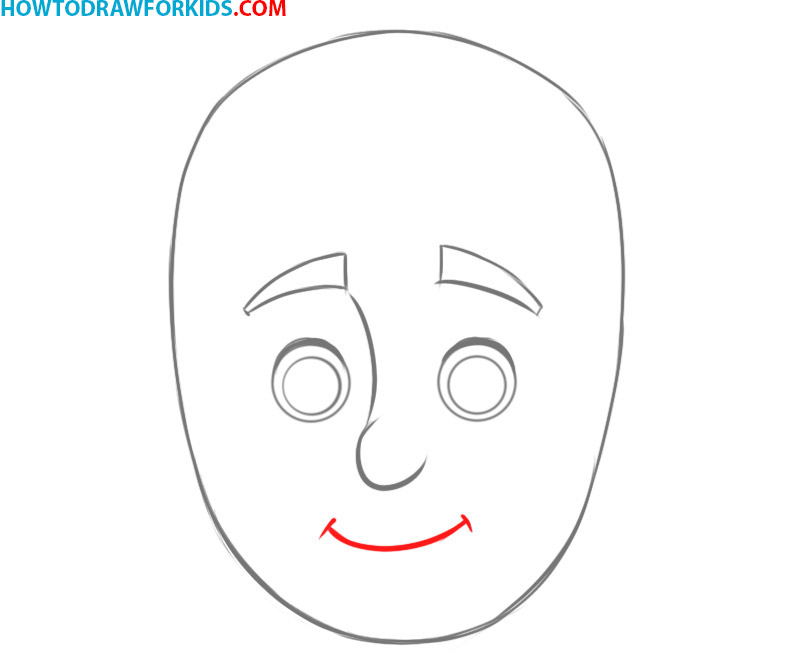
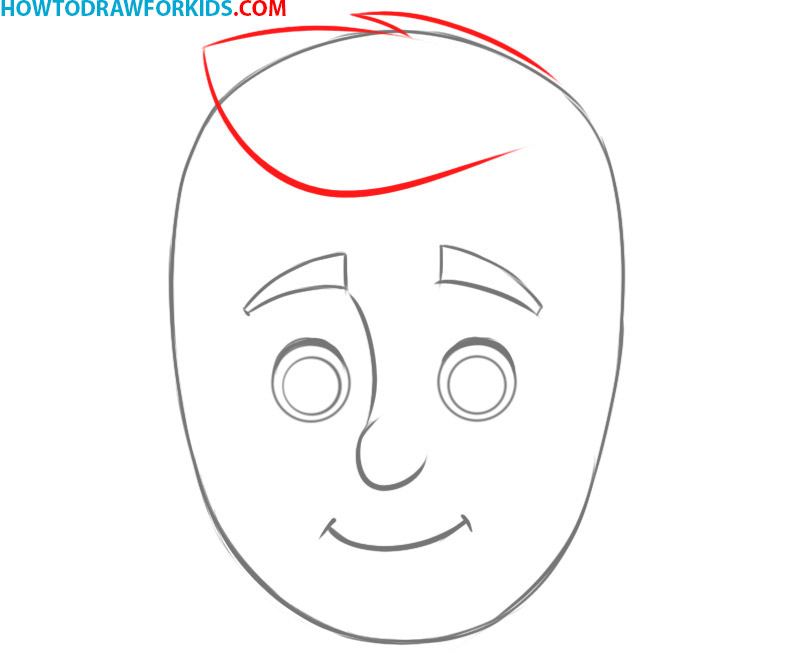
- Add the hair.
The seventh step involves adding hair to the head. Draw a sweeping curve from one side of the head to the other, forming a distinct hairstyle. Feel free to experiment with different hair lengths and styles, making adjustments to suit the overall look of the face
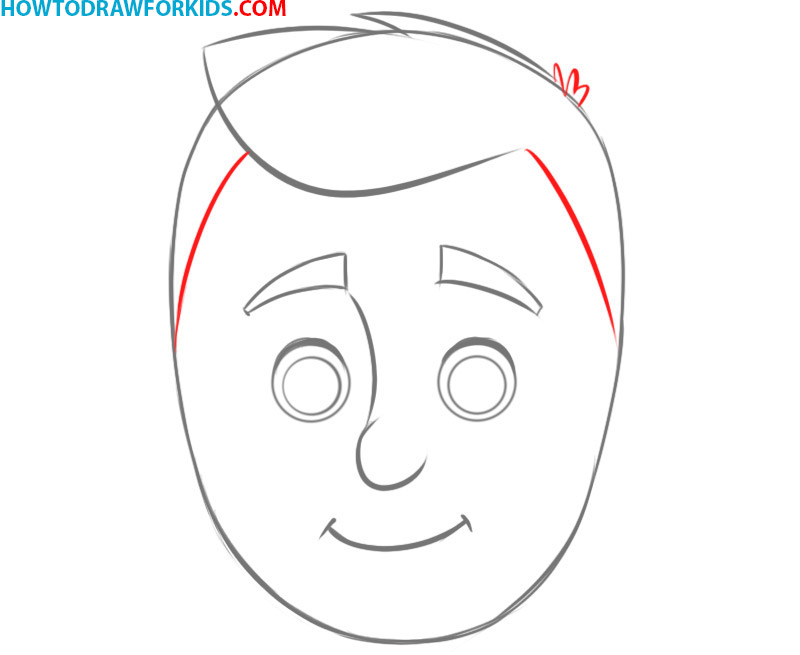
- Refine the hairstyle
Step eight refines the hairstyle further by adding additional details. Draw lines to indicate parting or strands of hair, following the direction of the initial sweeping curve. This gives the hairstyle more texture and complexity.
- Add the ears
In this step, ears are added to the sides of the head. Draw a small curve on each side, placed symmetrically at the same height. This step completes the basic facial features and helps frame the face.
Ears contribute to the proportionality of the face, ensuring it appears balanced and realistic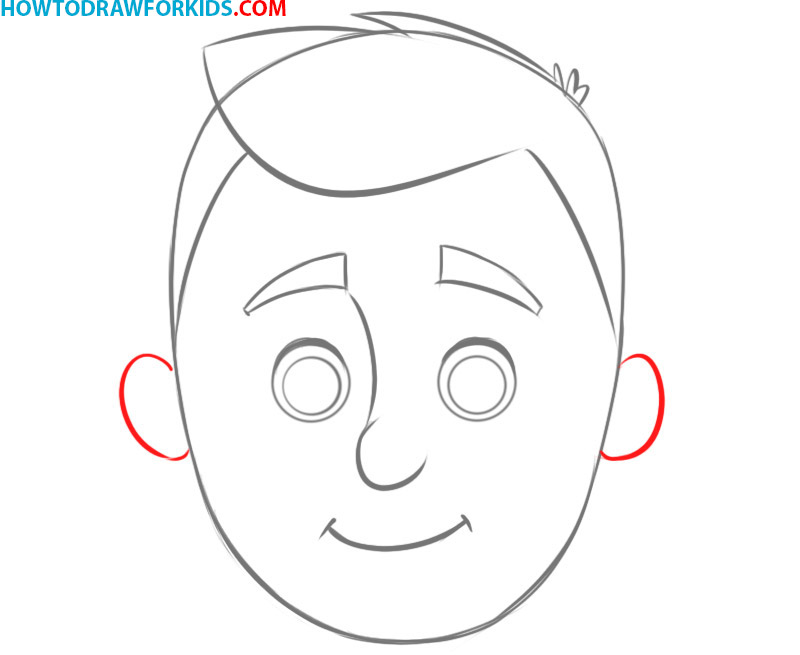
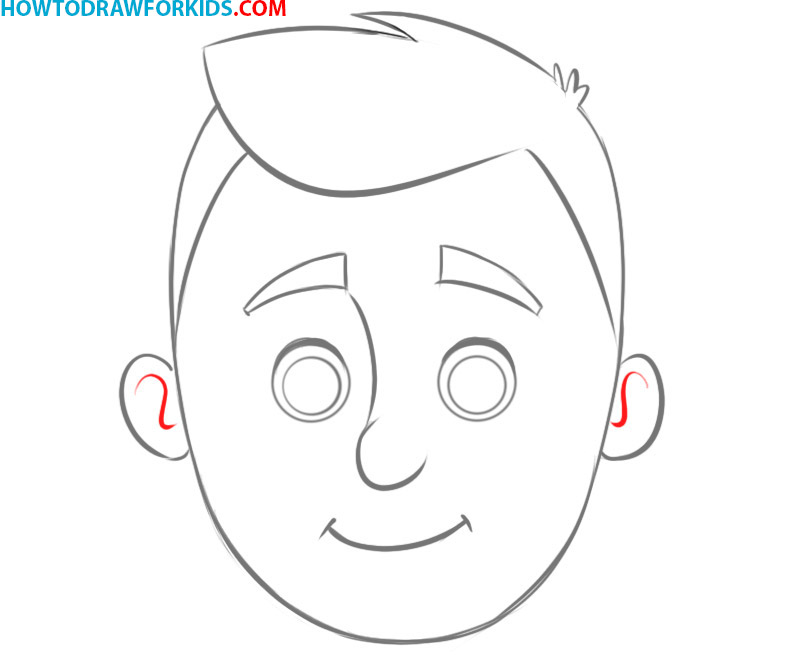
- Adding inner ear lines
In this step, add lines within the ears to give them more structure and detail. Start by drawing a small curve or line inside each ear, following the natural contour to create a realistic look.
- Color the drawing
In the final step, the face is colored in, bringing the drawing to life. Experiment with different shades and tones to match the character’s style and identity.


How to Draw a Face: Additional Tutorials
Drawing the human face is a very important skill for any artist. To master this skill as much as possible, let’s learn a few additional ways to draw a face.
Face Drawing Tutorial: Alternative Method
In the first instructions on this page, we first drew a circle as a base for the face, then we gradually added details. Now let’s try to draw a face without any preliminary step.

How to Draw a Face: Detailed Method
Now let’s try to look at the process of drawing a face using a more detailed method. In this instruction you can see 11 steps in which I will show in detail the entire process of depicting this part of the human body.

How to Draw a Face: Conveying Facial Features
The drawing is made in a cartoon style and the face looks very funny. There are no complex lines and preliminary markings, so you can quickly complete this task.
Keep proportions when drawing a face of a person, and also make sure that the parts of the face are symmetrical. If you have the desire and patience, then you will quickly master this lesson.

Face Drawing Tutorial: Conveying the Age
I suggest you complete another fascinating lesson in which you will learn how to draw an easy face step by step. The lesson contains nine simple steps that you can easily repeat.
As an example, I chose the face of a boy. The drawing is made in a cartoon style and contains simple elements that you can easily repeat. During the lesson, observe all proportions, and try to make the same lines as in the instructions.

Face Drawing Tutorial: The Simplest Method
So, if the instructions you saw above were difficult for you, let’s learn an easier method. In this tutorial we will try to draw a face using just 4 steps. In addition, we will greatly simplify the details and make the drawn character much younger.

Face Drawing Tutorial:
But perhaps all the lessons above were too simple for you. Or perhaps you want to draw a more realistic face. In this instruction, we will try to depict a face that is more similar to the real one.

Conclusion
So, the face drawing lesson for beginners has come to an end, and I really hope that my tutorial was really interesting and useful to you. I have tried to convey this important skill to you using the simplest methods possible.
Did I succeed or not? Were you able to learn how to draw a face using my tutorial? Write about it in the comments or send your work to me on social networks.


cool…
I love your art ! You are a true artist!
From, Chase Vance